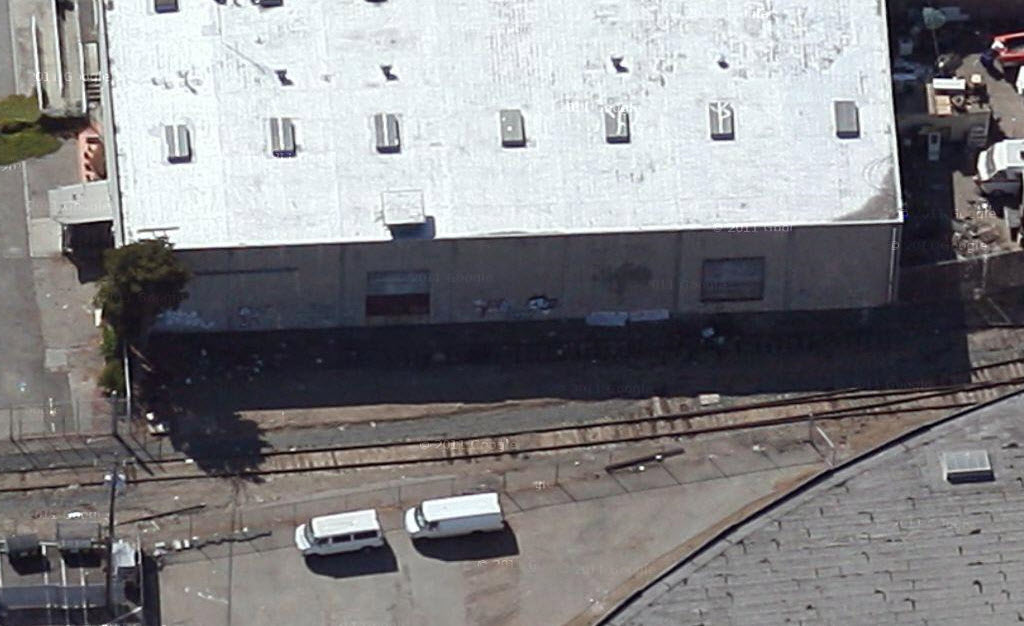
Abandoned Warehouse, Oakland, CA
I lived in Oakland, CA from 2002-2012, and found it to be a pretty good place to railfan. There is an industrial spur just west of I-880, and south of Jack London Square, with a few rail served industries, including a large Con-Agra plant. One year, while hosting my daughter's birthday party at a Pump-It-Up bouncy-house center, I spied an abandoned warehouse next door across the tracks. I thought it would make a nice background building, which either did or didn't get service on my layout (but could, at least).
This seemed like a simple application of Lance Mindheim's photo wallpaper approach to building construction. Read more about his work at www.lancemindheim.com.
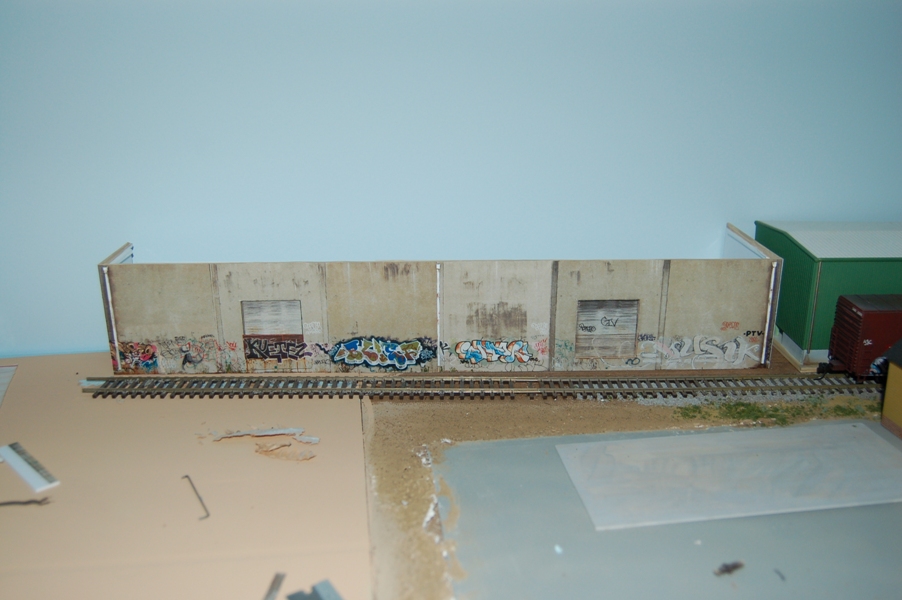

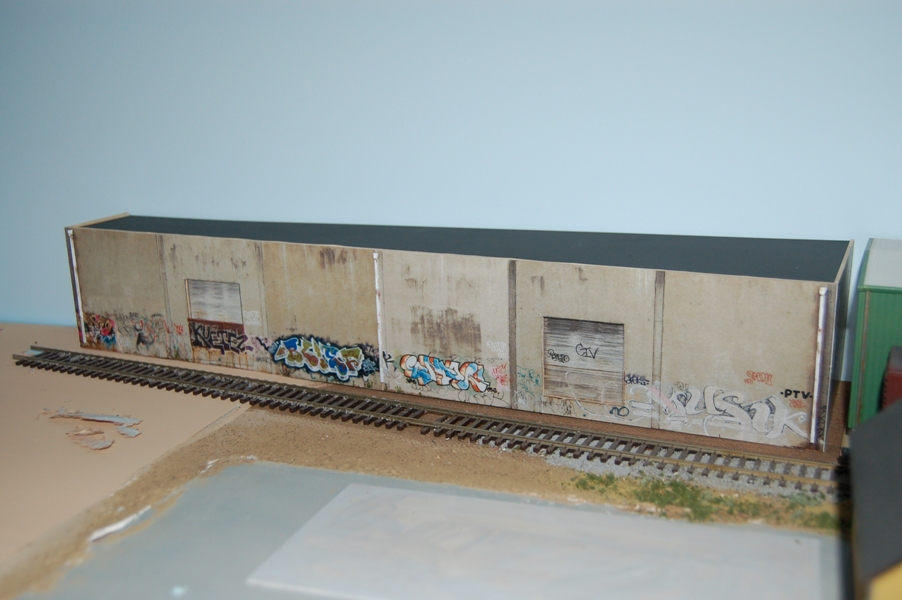
The building itself is pretty simple- styrene sheet from local plastic supplier (1/16” thickness). I created and printed the size I wanted on the computer first (use black & white settings for printing drafts, to save on expensive color ink). I use simple picture manager software for cropping, stretching and adjusting photos; I will use paint to touch up the wall segments (straightening vertical pillars, for example). I then import those individual images into PowerPoint to assemble a longer seamless stretch of wall. I can usually fit a couple of stretches onto a single page (landscape view).
I print a few test shots in B&W, adjusting the images in PowerPoint (the resize tool is key). Then I print in color, cut to size with good scissors, and use photo adhesive spray to glue to styrene sheet. I cut the sheet to size, including cutting out doorways and other recessed areas (which will get their own photo treatment in a styrene layer behind the main wall layer). Voila- a wall! Repeat for side walls too.
I add a few detail parts (gutters and downspouts; electrical boxes and the like) per prototype photos. Those are usually brush painted on 3 sides before gluing with CA.
After 3 sides of the wall are done, I glue some strip styrene scraps to create roof supports on the inside of the wall. More sheet styrene makes a roof, which is painted and set in place.
Very simple, and fun, and very effective (I think). I will have to set in place with some ground cover around the base, so that there is no seam showing.
Back to Model Structures page.
Back to Models homepage.
Back to home.